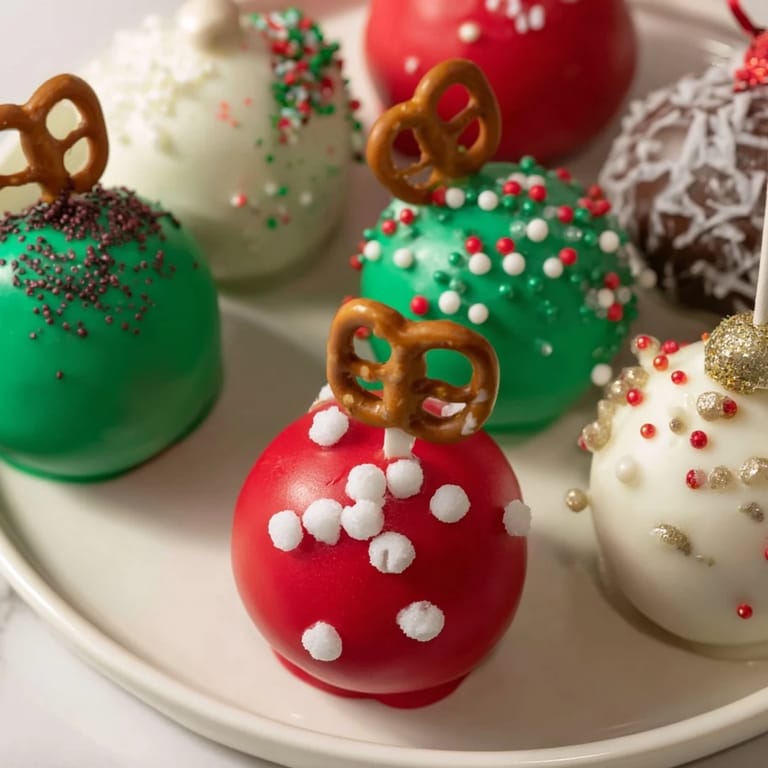
 Merken
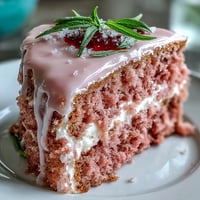
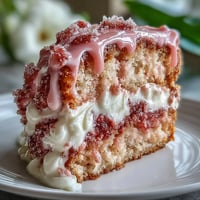
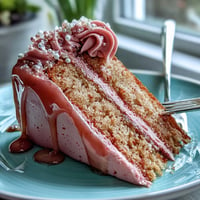
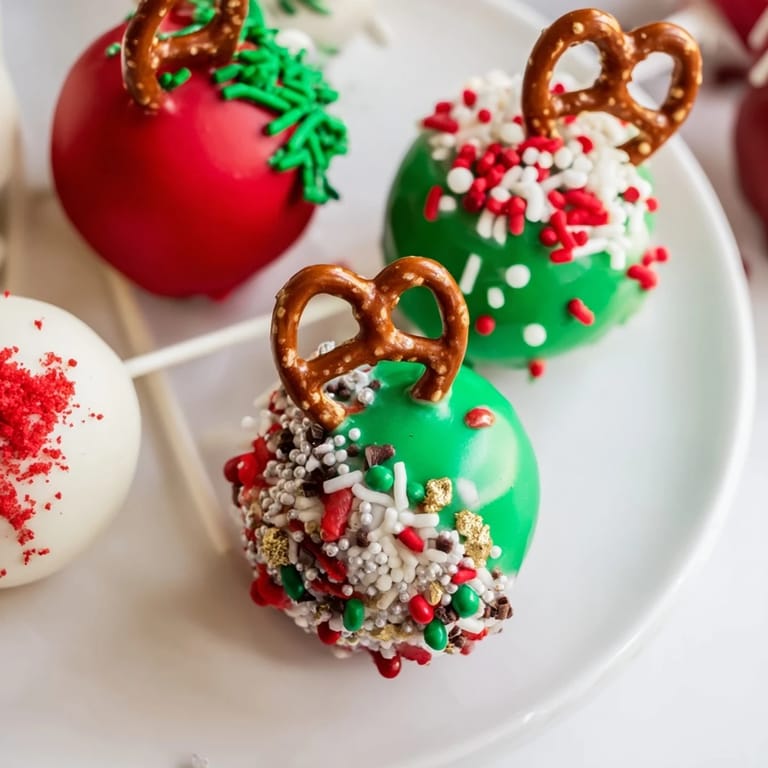
 Celebrate the holiday season with a delightful twist on classic cake pops. These ornament ball cake pops are not only delicious but also transform into vibrant, festive treats that steal the spotlight at any party. Covered in colorful candy melts and adorned with sprinkles and edible glitter, they capture the joyful spirit of the holidays and guarantee smiles from guests of all ages.
Merken Whether you choose classic vanilla or rich chocolate cake, these pops come together with cream cheese frosting for a moist and flavorful bite. The colorful coatings and decorations make each pop a miniature work of art, evoking the charm of holiday ornaments. With a bit of patience and creativity, these cake pops are sure to become a seasonal favorite.
Ingredients
Tired of Takeout? 🥡
Get 10 meals you can make faster than delivery arrives. Seriously.
One email. No spam. Unsubscribe anytime.
- 1 box (about 400 g) vanilla or chocolate cake mix (plus ingredients per package)
- 1/2 cup (120 g) cream cheese frosting or vanilla buttercream
- 500 g white chocolate or candy melts (assorted colors)
- 2 tbsp (25 g) vegetable shortening (optional, for smoother coating)
- Assorted sprinkles, edible glitter, and small candies
- 24 mini pretzel loops or candy-coated chocolate pieces (for ornament tops)
- Edible gold or silver luster dust (optional)
Instructions
- 1. Bake the cake
- Bake the cake according to package instructions. Allow to cool completely.
- 2. Crumble the cake
- Crumble the cooled cake into fine crumbs in a large mixing bowl.
- 3. Mix with frosting
- Add frosting gradually, mixing until the mixture holds together and can be shaped.
- 4. Shape cake balls
- Scoop out tablespoon-sized portions and roll into smooth balls. Place on a parchment-lined tray.
- 5. Chill cake balls
- Chill the cake balls in the refrigerator for at least 30 minutes.
- 6. Melt coating
- Melt the chocolate or candy melts in a microwave-safe bowl, stirring until smooth. Stir in shortening if needed for a thinner consistency.
- 7. Insert sticks
- Dip one end of a lollipop stick into the melted coating, then insert halfway into a cake ball. Repeat for all balls and chill again for 10 minutes to set.
- 8. Coat cake pops
- Dip each cake pop fully into the melted coating, gently tapping off excess.
- 9. Decorate
- Before the coating sets, decorate each pop with sprinkles, glitter, or candies to resemble ornament balls. Attach a mini pretzel loop or candy at the top for the ornament hook.
- 10. Set upright
- Stand pops upright in a foam block or cake pop stand to set fully.
- 11. Add shimmer
- Dust with edible luster dust for a shimmering effect, if desired.
Zusatztipps für die Zubereitung
Ensure the cake is fully cooled before crumbling to achieve fine crumbs. Chilling the cake balls helps them hold their shape better during the coating process. Use vegetable shortening sparingly to thin the coating for a smooth finish. Experiment with various candy melt colors to create a festive and vibrant display.
Varianten und Anpassungen
Opt for either vanilla or chocolate cake mix based on your preference. Customize decorations with edible markers for detailed designs. Incorporate different types of sprinkles, edible glitter, or small candies to add unique textures and colors to the ornament balls. Consider using flavored candy melts to enhance taste variety.
Serviervorschläge
Display cake pops upright on a decorated styrofoam base to create a stunning holiday centerpiece. These treats can be gifted as festive party favors or served alongside other seasonal desserts. Store in an airtight container at room temperature to maintain freshness for up to three days.
 Merken
 With this recipe, you not only create a scrumptious sweet but also craft a delightful visual treat that adds charm and cheer to your holiday gatherings. The colorful ornament ball cake pops promise fun in the kitchen and smiles around the table, making your celebrations even more memorable.
Fragen & Antworten zum Rezept
- → Wie bekomme ich eine glatte Glasur auf die Kugeln?
Die Glasur sollte langsam und gleichmäßig geschmolzen werden. Optionales Pflanzenfett sorgt für eine glattere Konsistenz. Die Kugeln nach dem Tauchen kurz abtropfen lassen, um überschüssige Glasur zu entfernen.
- → Wie lange muss die Masse kühlen vor dem Formen?
Mindestens 30 Minuten im Kühlschrank, damit die Masse fest genug ist, um Kugeln zu formen, aber nicht zu hart wird.
- → Kann ich verschiedene Farben für die Dekoration verwenden?
Ja, verschiedene Candy Melts in bunten Farben eignen sich ideal, um lebendige und festliche Kugeln zu gestalten.
- → Wie bewahre ich die fertigen Kugeln auf?
Die Kugeln sollten luftdicht verschlossen und bei Raumtemperatur gelagert werden. So bleiben sie bis zu 3 Tage frisch.
- → Welche Werkzeuge sind für die Zubereitung nötig?
Ein Rührgerät oder große Schüssel, Backblech, Lollipop-Sticks und eine Styroporplatte zum Trocknen sind hilfreich.